WayFi Setup Guide for RUCKUS Wireless LAN Controller: RadSec & Passpoint Configuration
Learn how to configure your RUCKUS SmartZone Controller (5.1.2+) with WayFi’s RadSec and Passpoint network. Step-by-step instructions for seamless and secure connectivity.
GUIDES
WayFi Wireless
1/28/20253 min read

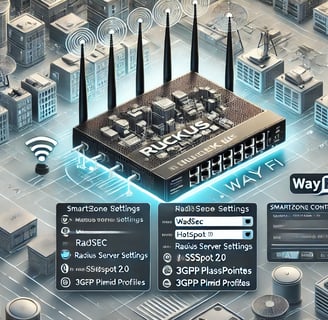
WayFi Setup Guide for RUCKUS Wireless LAN Controller 5.1.2
Configuring your RUCKUS SmartZone Controller to work with WayFi's RadSec and Passpoint-enabled network is crucial for providing secure and seamless connectivity. This step-by-step guide walks you through the process of integrating your RUCKUS controller with WayFi using RADIUS over TLS (RadSec) and Hotspot 2.0 (Passpoint) technologies.
Prerequisites for WayFi Setup
Before you start the configuration process, ensure you meet the following requirements:
1. Controller and Firmware Versions
SmartZone Controller Version: 5.1.2 or higher.
Access Point Firmware: Compatible with SmartZone 5.1.2 or above.
2. WayFi RadSec Certificate Bundle
Obtain these certificates from WayFi support:
wayfi.radsec.cacert.pem (CA Certificate).
cert.pem (Client Certificate).
key.pem (Private Key).
3. NAS-ID Configuration
Set the NAS-ID to match the MAC address of one access point or the eth0 interface MAC address.
4. RadSec Support Check
If your controller supports RadSec, proceed with the configuration steps.
If not, contact WayFi support for a custom RadSec proxy solution.
Step 1: Log in to the RUCKUS SmartZone Controller
Log in to the RUCKUS SmartZone Controller as an administrator.
Navigate to Services & Profiles > Wireless LANs to begin the configuration.
Step 2: Create a Wireless LAN for WayFi
Click ➕ Create to open the Create WLAN Configuration dialog box.
General Options
Name: Enter WayFi.
SSID: Use .WayFi Cellular Booster (recommended for faster location approval).
Zone and WLAN Group: Select the default zone and WLAN group unless specified otherwise.
Authentication Options
Select Hotspot 2.0 Access. This automatically sets the authentication method to 802.1X EAP.
Encryption Options
The encryption method defaults to WPA2.
RADIUS Options
NAS-ID:
Select User Defined and set it to the MAC address of one AP at the location.
Step 3: Configure the Hotspot 2.0 Profile
Set the Accounting Server Update Interval to 300 seconds (5 minutes).
Click ➕ next to Hotspot 2.0 Profile to create a new profile.
Create Operator Profile
Operator Name: WayFi-Operator.
Domain Name: Add the following domains (one per line):
Friendly Name: WayFi Network.
Create Identity Provider Profile
Identity Provider Name: WayFi-Identity-Provider.
Realm Name: Add the following NAI realms (one per line):
*hellohelium.com, Certificate, EAP-TTLS.
*freedomfi.com, Certificate, EAP-TTLS.
*wayru.io, Certificate, EAP-TTLS.
Step 4: Configure the Secure RADIUS Connection
Navigate to Services & Profiles > Authentication.
Select ➕ Create to open the Create Authentication Service dialog box.
Primary RADIUS Server
IP Address: 24.144.66.102.
Port: 2083.
Shared Secret: radsec.
Certificates:
Client Certificate: Upload cert.pem.
Private Key: Upload key.pem (leave the password field blank).
CA Certificate: Upload wayfi.radsec.cacert.pem.
Secondary RADIUS Server
Repeat the same steps for the secondary server:
IP Address: 178.128.133.4.
Port: 2083.
Step 5: Configure the Roaming Consortium OI
Navigate to Services & Profiles > Hotspot 2.0 > Roaming Consortium.
Click ➕ Add and enter the following:
Profile Name: WayFi_RCOI.
OI Values:
8c1f646810
f4f5e8f5f4
baa2d00000
00500f
5a03ba0000
004096
Save and apply the changes.
Step 6: Configure the 3GPP PLMNID
Navigate to Services & Profiles > Hotspot 2.0 > 3GPP Network.
Click ➕ Add and enter the following:
Profile Name: WayFi_3GPP.
PLMNIDs:
311,180
313,100
310,280
310,410
310,150
Save and apply the changes.
Step 7: Test Your WayFi Network
Ensure your access points are broadcasting the .WayFi Cellular Booster SSID.
Use a Passpoint-capable device to verify auto-connect functionality.
If issues arise, verify the following:
NAS-ID configuration.
Hotspot 2.0 Profile settings.
RADIUS server settings and certificates.
Additional Recommendations
Assign the SSID to a VLAN: Use a dedicated VLAN to isolate traffic.
Enable network and client isolation: Prevent devices from communicating with each other.
Disable multicast traffic: Reduce unnecessary network overhead.
Disable the 6GHz band: Enable only the 2.4GHz and 5GHz bands for better compatibility.
By following these steps, your RUCKUS SmartZone Controller will seamlessly integrate with WayFi’s secure RadSec and Passpoint-enabled network, ensuring optimal connectivity for your users.
FAQs
1. What is RadSec?
RadSec (RADIUS over TLS) is a secure protocol for encrypting authentication and authorization traffic.
2. What version of RUCKUS SmartZone is required?
You need version 5.1.2 or higher.
3. Can I use the 6GHz band with Passpoint?
No, Passpoint is not compatible with the 6GHz band. Stick to 2.4GHz and 5GHz.
4. How do I obtain WayFi RadSec certificates?
Contact WayFi support to request the necessary certificate bundle.
5. Why assign the SSID to a VLAN?
A VLAN isolates WayFi traffic, improving security and performance.
6. What is the NAS-ID?
The NAS-ID identifies the access point within the RADIUS configuration, often set as the MAC address of the AP.
WayFi Wireless
Helpful Pages
SUBSCRIBE TO OUR NEWSLETTER
© 2024 - 2025. All rights reserved.
Browser Extentions
TOOLS