WayFi Setup Guide for Cambium Networks using CnMaestro: Step-by-Step Configuration
Learn how to set up WayFi Wireless with Cambium Networks Enterprise Wi-Fi APs. This step-by-step guide covers RadSec proxy configuration, WLAN setup, and Hotspot 2.0 integration for secure and seamless connectivity.
GUIDES
WayFi Wireless
2/7/20254 min read


WayFi’s RadSec Authentication Servers:
Primary Server: IP: 24.144.66.102, Port: 2083
Secondary Server: IP: 178.128.133.4, Port: 2083
Prerequisites
cnMaestro Access: Admin access to Cambium's cnMaestro cloud or on-premises controller.
Ubuntu VM: A Linux VM to host the RadSec proxy.
RadSec Certificate Bundle:
wayfi.radsec.cacert.pem: CA Certificate
cert.pem: Client Certificate
key.pem: Private Key
Docker Installed: Ensure Docker is installed on the Ubuntu VM.
Steps to Configure
Step 1: Deploy the RadSec Proxy
WayFi can provide a radsec proxy docker instance for you. Just ask.
Set Up the Ubuntu VM:
Create a VM with Docker installed.
Assign a static IP address to the VM.
Obtain WayFi Certificates:
Download the RadSec certificate bundle from WayFi support.
Extract the files: cert.pem, key.pem, and wayfi.radsec.cacert.pem.
Deploy and Configure RadSec Proxy:
Deploy the RadSec proxy on the Ubuntu VM.
Configure the proxy to route RADIUS traffic to WayFi’s servers (24.144.66.102 and 178.128.133.4).
Verify the proxy is running and listening on ports 1812 (authentication) and 1813 (accounting).
Step 2: Configure a Wireless LAN (WLAN) in cnMaestro
Create a WLAN:
Navigate to Configuration > WLANs and AP Groups > WLANs.
Click Create WLAN.
General Settings:
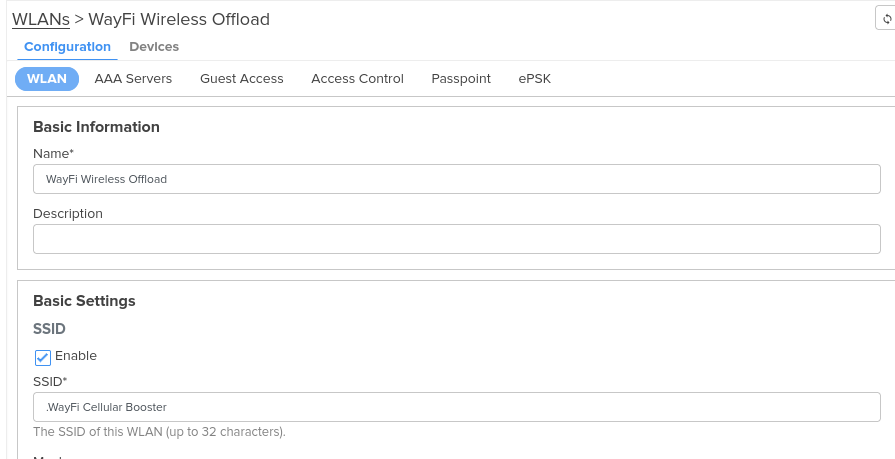
SSID: Enter .WayFi Cellular Booster
Broadcast SSID: Enable.
Activate on Radio: Enable for 2.4GHz and 5GHz only.
Security Settings:
Security: Set to WPA2 Enterprise (802.1X).
For RADIUS Authentication Server:
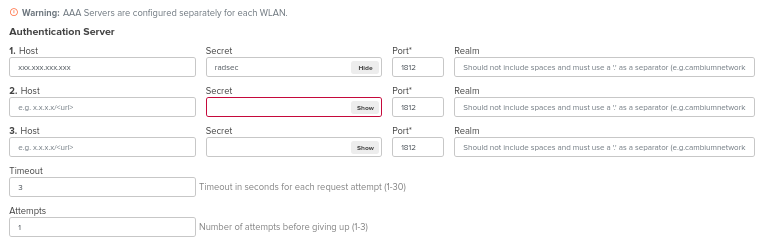
Server IP: Enter the static IP of the VM hosting the RadSec proxy.
Auth Port: 1812.
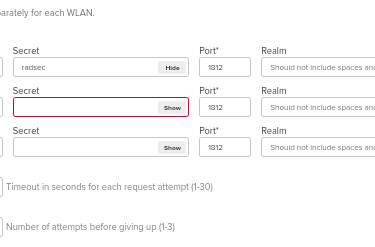
Shared Secret: Enter radsec.
For RADIUS Accounting Server:
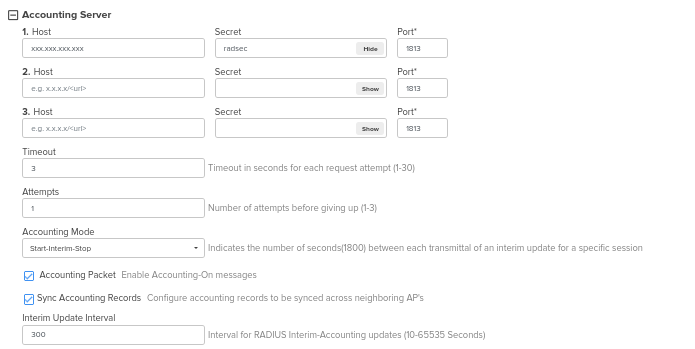
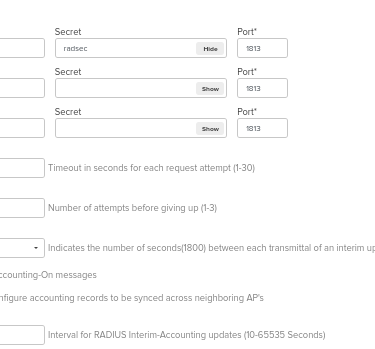
Server IP: Same as above.
Accounting Port: 1813.
Shared Secret: Enter radsec.
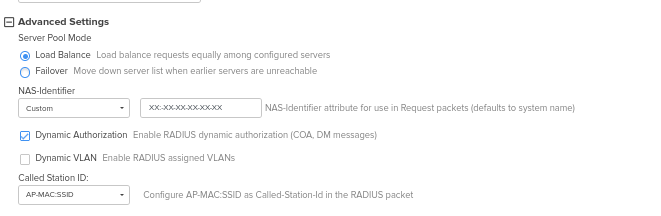
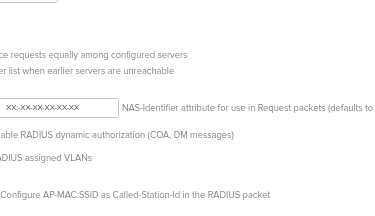
NAS ID Configuration:
Navigate to Advanced Settings in the WLAN configuration.
NAS ID:
Set the NAS ID to the MAC address of one of the APs managing the site
(e.g., AA-BB-CC-DD-EE-FF). All upper, - delineated is default.
Please use All Lower, No Delineation. EX. (e.g., aabbccddeeff) instead.
This ensures accurate identification in WayFi’s system.
Save and Deploy:
Save the WLAN configuration and deploy it to the AP group.
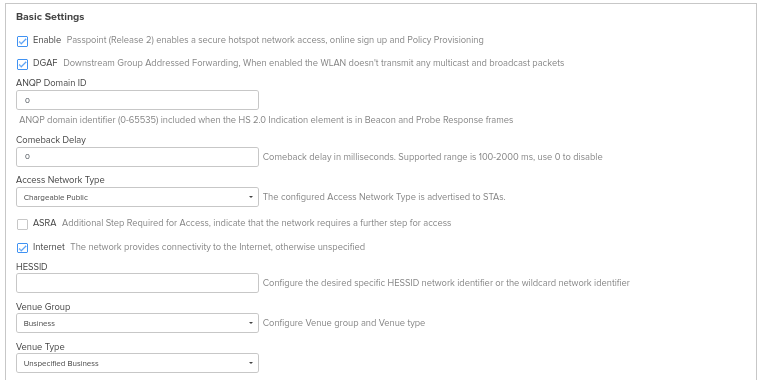
Step 3: Enable Hotspot 2.0 (Passpoint)
Enable Hotspot 2.0 (Passpoint):
Navigate to Configuration > WLANs and AP Groups > WLANs.
Edit the WayFi WLAN.
Enable Hotspot 2.0 under Passpoint Settings.


Step 4: Assign WLAN to AP Group
Navigate to Configuration > WLANs and AP Groups.
Click + New AP Group and assign the WayFi WLAN to the group.
Attach the AP group to your Enterprise Wi-Fi APs:
Go to Manage > Specific Device > Configuration.
Select the new AP group from the dropdown.
Save and deploy the configuration.
Step 5: Upgrade AP Firmware
Navigate to Manage > Access Points in cnMaestro.
Select the APs and initiate the firmware upgrade.
Ensure the APs are running the latest firmware that supports Hotspot 2.0.
Additional Recommendations
Network and Client Isolation:
Enable isolation to prevent clients from communicating directly with each other.
Disable Multicast Traffic:
Minimize unnecessary network overhead.
Disable 6GHz Band:
Enable only 2.4GHz and 5GHz bands for compatibility.
Validation
Confirm Configuration:
Verify that all settings in cnMaestro match the required configuration.
Broadcast SSID:
Ensure the WayFi SSID is active and broadcasting.
Test Connectivity:
Use a Passpoint-enabled device to confirm seamless connectivity.
Check RadSec Proxy Logs:
Monitor the proxy logs to confirm successful RADIUS communication.
Troubleshooting
RadSec Proxy Issues
Verify the proxy is running and listening on ports 1812 and 1813.
Check the proxy logs for connection errors.
Authentication Errors
Ensure the NAS ID matches the MAC address of one of the AP's at the location.
Confirm the RADIUS settings (IP, port, shared secret).
Hotspot 2.0 Configuration
Verify domains, RCOI, and 3GPP PLMNIDs are correctly configured.
By following this guide, your Cambium Enterprise APs will be fully integrated with WayFi’s secure RadSec and Hotspot 2.0 network. For additional assistance, contact WayFi Support.
Passpoint Settings:
Access Network Type: Chargeable Public.
Venue Group: Choose an appropriate venue group (e.g., Shopping Mall).
Venue Type: Select an appropriate venue type (e.g., Business).
Domain Name:
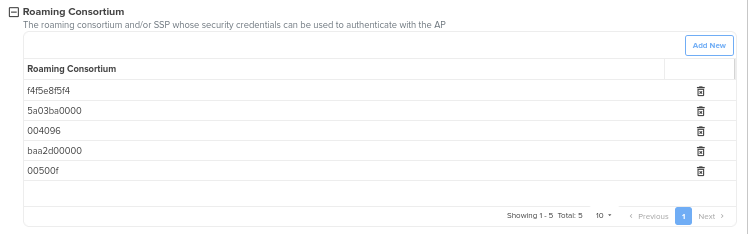
Roaming Consortium OI (RCOI):
Add the following values:
8c1f646810
f4f5e8f5f4
baa2d00000
00500f
5a03ba0000
004096
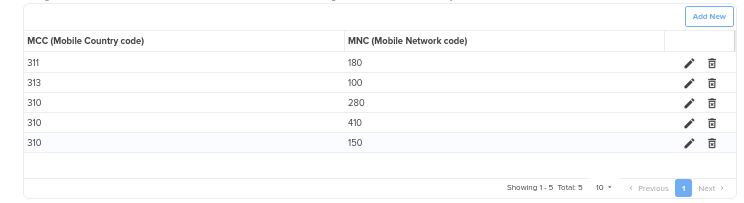
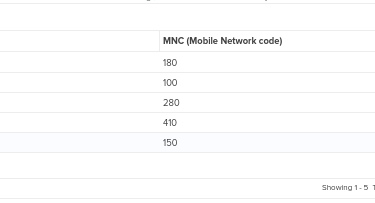
3GPP PLMNIDs:
Add the following MCC/MNC values:
311,180
313,100
310,280
310,410
310,150
WayFi Setup Guide for Cambium cnMaestro
Cambium Networks
Overview
This guide provides step-by-step instructions to integrate WayFi Wireless with Cambium Enterprise Wi-Fi Access Points (APs). Cambium does not natively support RADIUS over TLS (RadSec), so a RadSec proxy is required to securely relay AAA traffic between the Cambium APs and WayFi’s RadSec servers.

WayFi Wireless
Helpful Pages
SUBSCRIBE TO OUR NEWSLETTER
© 2024 - 2025. All rights reserved.
Browser Extentions
TOOLS